There’s something magical about summer strawberries, isn’t there? When I stumbled upon this freezer strawberry jam recipe, I felt like I’d discovered a golden ticket to savoring those sweet, sun-kissed flavors all year round. It’s the perfect quick solution for busy days when you crave a taste of summer without the fuss of traditional canning. Plus, who doesn’t love a homemade treat that can impress family and friends? As a busy mom, I truly appreciate how easy this jam is to whip up, capturing the essence of those fresh berries in a jar, ready for any moment.
Why You’ll Love This Freezer Strawberry Jam Recipe
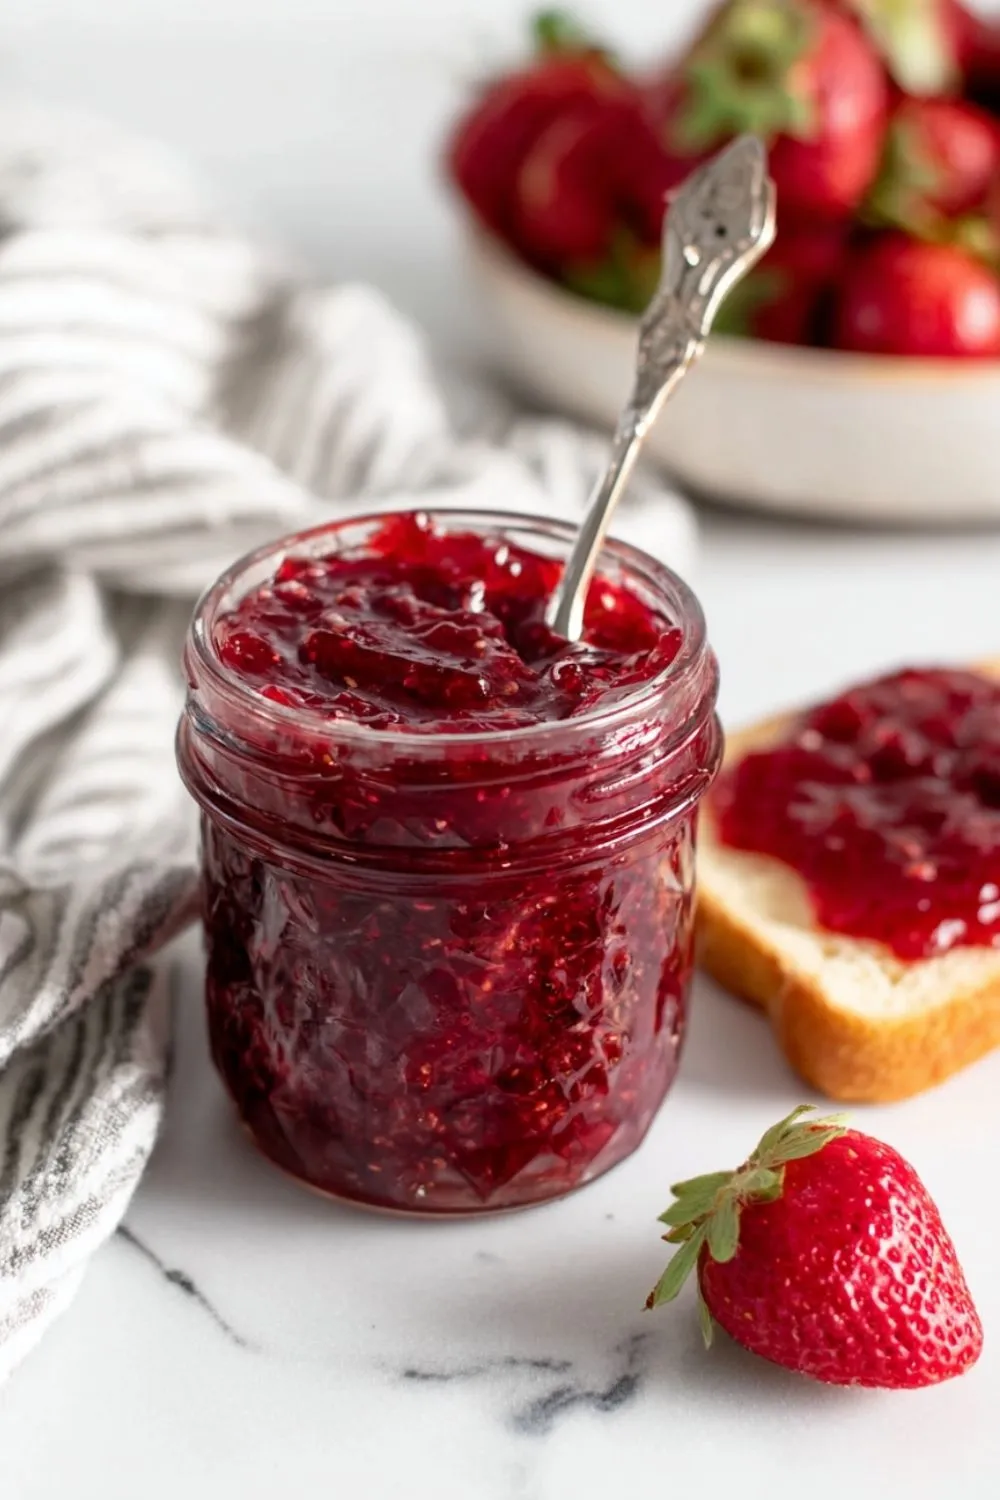
This freezer strawberry jam recipe is a game-changer for busy moms like me. It’s incredibly easy to make, taking only about 15 minutes from start to finish. You’ll love how vibrant and fresh the flavors are, making it a delight on toast or in desserts. Plus, there’s no cooking involved! Just mix, freeze, and enjoy the taste of summer whenever you want. It’s truly a no-fuss way to preserve those glorious strawberries!
Ingredients for Freezer Strawberry Jam Recipe
To create your delightful freezer strawberry jam, you’ll need a handful of simple ingredients that are likely already in your kitchen. Here’s what you’ll gather:
- Fresh strawberries: Ripe berries are essential for the best flavor. Look for strawberries that are bright red and fragrant.
- Granulated sugar: This sweetener is vital for balancing the tartness of the strawberries and helping to preserve the jam.
- Lemon juice: A splash of acidity enhances the flavor, providing a bright note that complements the sweetness of the strawberries. You can use fresh lemon juice or bottled, depending on what you have on hand.
While these are the main ingredients, you can also experiment with optional add-ins like:
- Vanilla extract: A teaspoon can add a warm, aromatic note to your jam.
- Chia seeds: If you’re looking for added nutrition and a thicker texture, consider mixing in a tablespoon or two.
For the exact measurements of each ingredient, scroll down to the bottom of the article where you’ll find the recipe available for printing. Get ready to enjoy the fruity goodness!
How to Make Freezer Strawberry Jam Recipe
Step 1: Prepare the Strawberries
First things first, let’s get those strawberries ready! Start by washing them under cool, running water to remove any dirt or pesticides. Gently rub each berry with your fingers, making sure they’re nice and clean. Next, hull the strawberries by removing the green tops. This is crucial because the hull can be tough and bitter. I find that a simple paring knife does the trick beautifully. Once you’ve got them hulled, let them dry on a clean kitchen towel, and you’re ready for the next step!
Step 2: Mash the Strawberries
Now it’s time for some berry magic! Place your clean strawberries in a large bowl and start mashing them. You can use a fork, a potato masher, or even your hands if you’re feeling adventurous! The goal here is to break them down into a chunky puree. This helps release their lovely juices, which are essential for flavor. Plus, the texture adds character to your jam. I love leaving some bigger pieces for that delightful strawberry bite. It’s like summer in every spoonful!
Step 3: Combine Ingredients
Once your strawberries are mashed, it’s time to sweeten the deal! Sprinkle in the granulated sugar and add the lemon juice. Stir everything together until the sugar is well combined. This step is important because the sugar needs to dissolve completely for a smooth jam. I usually let it sit for a few minutes while stirring occasionally. The strawberries will start to release even more juice, creating a beautiful, sweet mixture that smells heavenly. Honestly, this is the moment when I can hardly wait to taste it!
Step 4: Let the Mixture Sit
Now, here’s a little patience test for you! Let the mixture sit at room temperature for about 10 minutes. This isn’t just a waiting game; it’s when the flavors truly meld together. The sugar continues to dissolve, and the strawberries become even juicier. I find that this short wait really makes a difference in the final flavor. It’s like letting a good story unfold, with each moment adding depth to the tale of your jam!
Step 5: Transfer to Containers
With your mixture ready, it’s time to think about storage. Choose freezer-safe containers that can hold about 4 cups of jam. I prefer glass jars or plastic containers with tight-fitting lids. Fill them with the jam, but don’t forget to leave a little space at the top. This allows the jam to expand as it freezes. Trust me, a little extra room saves you from messy spills later. It’s all about keeping the jam safe and sound!
Step 6: Freezing the Jam
Finally, let’s seal the deal! Make sure the lids are securely fastened on your containers to keep out any unwanted air. Label each container with the date, so you know when you made your sweet creation. Place them in the freezer, where they can stay fresh for up to a year. I love knowing I have a stash of summer flavors ready to brighten up my mornings or sweeten up a dessert. Just remember to thaw a jar in the refrigerator before you dive in. Enjoy your homemade strawberry bliss!
Tips for Success
- Always use ripe strawberries for the best flavor; they should be sweet and fragrant.
- Don’t skip the waiting time after mixing; it enhances the jam’s flavor.
- Consider using glass containers for freezing; they help maintain freshness.
- Label your containers with the date and flavor for easy access later.
- Feel free to experiment with flavors like vanilla or mint for a unique twist!
Equipment Needed
- Mixing bowl: A large bowl for mashing and mixing your strawberries. A sturdy plastic or glass bowl works well!
- Potato masher or fork: Use these to mash the strawberries. A food processor is an alternative if you prefer a smoother texture.
- Freezer-safe containers: Glass jars or plastic containers with tight lids are perfect for storing your jam.
Variations of Freezer Strawberry Jam Recipe
- Strawberry-Basil Jam: Add finely chopped fresh basil to your mixture for a delightful herbal twist!
- Strawberry-Lemonade Jam: Replace some of the sugar with lemonade concentrate for a zesty, refreshing flavor.
- Strawberry-Rhubarb Jam: Mix in chopped rhubarb for a tangy kick that complements the sweetness of the strawberries.
- Low-Sugar Strawberry Jam: Use a sugar substitute or low-sugar pectin to reduce calories while still enjoying the classic taste.
- Spicy Strawberry Jam: Incorporate a pinch of cayenne pepper or crushed red pepper flakes for a sweet and spicy flavor explosion!
Serving Suggestions for Freezer Strawberry Jam Recipe
- Spread the jam on warm, toasted bread or homemade biscuits for a delightful breakfast treat.
- Swirl it into yogurt or oatmeal for a burst of sweetness and color.
- Serve it as a topping for pancakes or waffles, drizzling it generously.
- Pair with cream cheese on crackers for an easy and elegant appetizer.
- Use it as a filling for pastries or cakes to impress your guests!
FAQs about Freezer Strawberry Jam Recipe
Can I use frozen strawberries for this freezer strawberry jam recipe?
Absolutely! While fresh strawberries offer the best flavor, frozen strawberries can work in a pinch. Just thaw them first and drain excess liquid before mashing. Your jam will still be delicious!
How long does freezer strawberry jam last in the freezer?
This jam can be stored in the freezer for up to one year. Just make sure to label your containers with the date. You’ll want to enjoy it within that time for the best flavor!
Can I reduce the sugar in this jam recipe?
Yes, you can reduce the sugar if you prefer a less sweet jam. Just keep in mind that sugar not only sweetens but also helps with preservation. You may want to experiment with sugar substitutes or low-sugar pectin for best results.
What can I do if my jam is too runny?
If your jam turns out runny, you can try adding a bit more sugar or cooking it down slightly if you decide to heat it. However, since this is a freezer strawberry jam recipe, it’s best enjoyed as is for that fresh taste!
How do I thaw the jam properly?
The best way to thaw your freezer strawberry jam is to move it from the freezer to the refrigerator and let it sit overnight. This keeps the texture intact and ensures it tastes just as fresh as the day you made it!
Final Thoughts
Making this freezer strawberry jam recipe is like capturing a piece of summer sunshine in a jar. The simplicity of the process allows me to focus on the joy of crafting something delicious for my family. Each spoonful bursts with flavor, reminding me of sunny days spent picking strawberries. Plus, knowing I have a stash of homemade jam waiting in my freezer makes me feel accomplished. Whether it’s a quick breakfast or a special dessert topping, this jam brings a smile to my face and a taste of joy to every meal. Enjoy the sweetness of summer, even in winter!
Print
Freezer Strawberry Jam Recipe: Discover the Easiest Way!
- Prep Time: 15 minutes
- Cook Time: 0 minutes
- Total Time: 15 minutes
- Yield: About 4 cups 1x
- Category: Condiment
- Method: Freezing
- Cuisine: American
- Diet: Vegetarian
Description
This freezer strawberry jam recipe is a simple and convenient way to preserve fresh strawberries without the need for canning. It captures the sweetness of summer in a jar and can be stored in the freezer for later use.
Ingredients
- 2 pounds fresh strawberries
- 2 cups granulated sugar
- 1/4 cup lemon juice
Instructions
- Wash and hull the strawberries, then mash them in a large bowl.
- Add the sugar and lemon juice to the mashed strawberries, stirring until the sugar is dissolved.
- Let the mixture sit for about 10 minutes to allow the flavors to meld.
- Transfer the jam to freezer-safe containers, leaving some space at the top for expansion.
- Seal the containers and place them in the freezer. The jam can be stored for up to one year.
Notes
- Use fresh, ripe strawberries for the best flavor.
- This recipe can be doubled or halved as needed.
- Thaw in the refrigerator before using.
Nutrition
- Serving Size: 1 tablespoon
- Calories: 50
- Sugar: 12g
- Sodium: 0mg
- Fat: 0g
- Saturated Fat: 0g
- Unsaturated Fat: 0g
- Trans Fat: 0g
- Carbohydrates: 13g
- Fiber: 0g
- Protein: 0g
- Cholesterol: 0mg