Why Make This Recipe
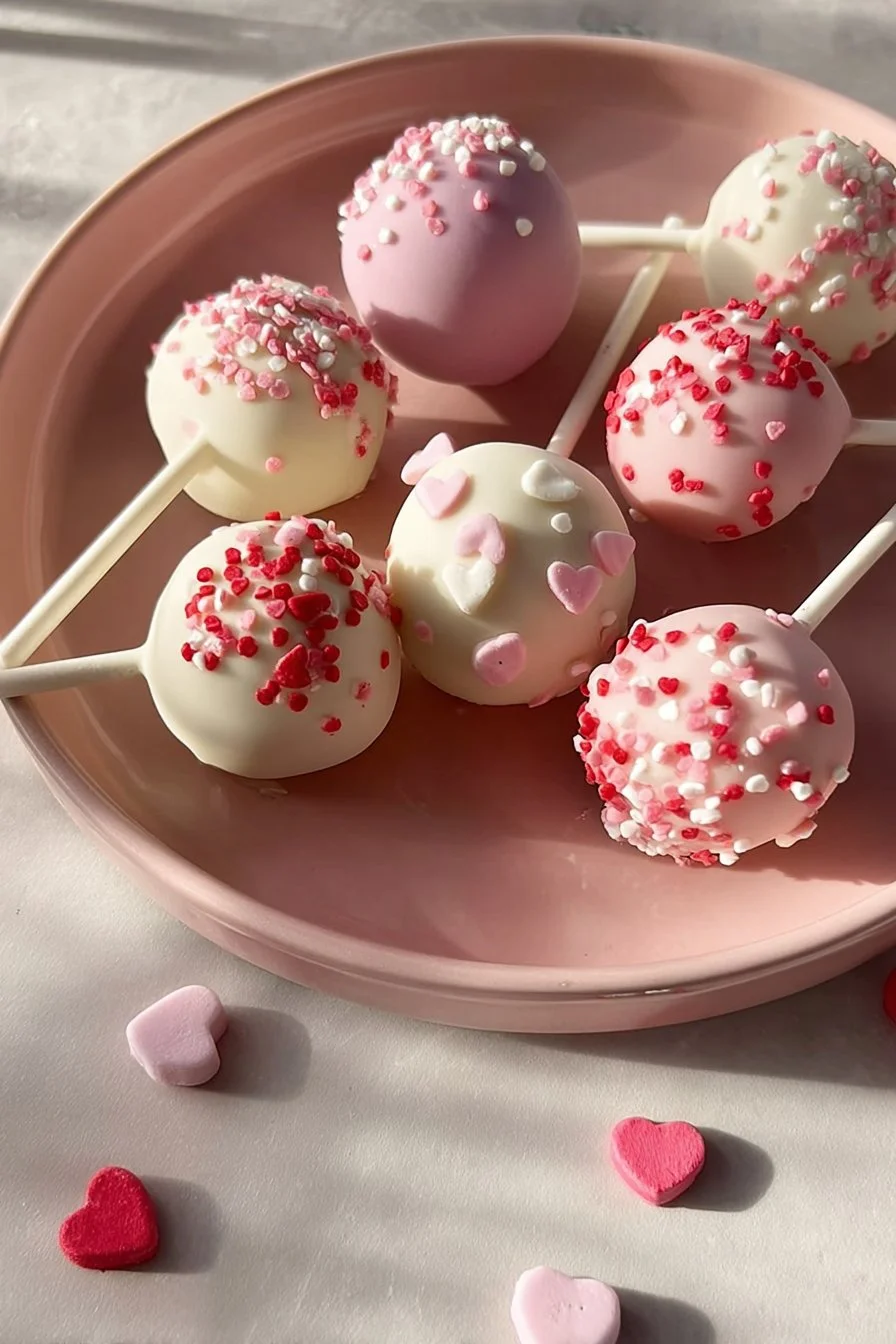
Valentine’s Day Cake Pops are a fun and delightful treat perfect for celebrating love. They are easy to make and can be customized with your favorite flavors and decorations. Whether you’re creating them for a special someone, kids, or friends, these little bites of sweetness bring joy and sweetness to any Valentine’s celebration.
How to Make Valentine’s Day Cake Pops
Ingredients:
- 1 cake mix (your choice)
- 1 cup frosting (store-bought or homemade)
- 12 oz chocolate melting wafers or chocolate chips
- Lollipop sticks
- Sprinkles (optional)
Directions:
- Bake the cake according to package instructions and let it cool completely.
- Crumble the cooled cake into a large bowl.
- Mix in the frosting until well combined.
- Roll the mixture into small balls and place them on a baking sheet.
- Freeze for about 30 minutes until firm.
- Melt the chocolate according to package instructions.
- Dip the tip of each lollipop stick into the melted chocolate, then insert it into a cake ball.
- Dip each cake pop into the melted chocolate, coating it completely.
- Allow excess chocolate to drip off and then place the pops upright in a stand or a piece of styrofoam.
- Decorate with sprinkles if desired and let set.
How to Serve Valentine’s Day Cake Pops
Serve these adorable cake pops on a decorative platter or in a cute vase. You can add them to a treat table at a party or give them as gifts to loved ones. They are easy to grab and enjoy, making them a great dessert option for any Valentine’s gathering.
How to Store Valentine’s Day Cake Pops
To store your cake pops, keep them in an airtight container at room temperature for up to a week. If you want them to last longer, you can store them in the fridge for up to two weeks. Just be sure to let them sit at room temperature for a little while before serving.
Tips to Make Valentine’s Day Cake Pops
- Make sure to let the cake cool completely before crumbling it to avoid soggy cake pops.
- Use quality chocolate for dipping to get a smooth and delicious coating.
- Experiment with different cake flavors and frosting combinations to find your favorite mix.
- If you’re using colorful sprinkles, add them right after dipping the cake pops in chocolate for a festive touch.
Variation
You can easily change the flavors of your cake pops by using different cake mixes, such as chocolate, vanilla, or red velvet. Additionally, try using flavored chocolate melts, like white chocolate or colored candy melts, for a fun twist.
FAQs
Q1: Can I use any type of cake mix?
A1: Yes, you can use any flavor of cake mix that you like! Chocolate and vanilla are popular choices.
Q2: How long do cake pops last?
A2: Cake pops can last up to a week at room temperature or up to two weeks in the fridge when stored properly in an airtight container.
Q3: Can I freeze cake pops?
A3: Yes, you can freeze cake pops. Just place them in an airtight container and store them in the freezer for up to a month. Let them thaw before serving.

Valentine’s Day Cake Pops
- Prep Time: 15 minutes
- Cook Time: 30 minutes
- Total Time: 45 minutes
- Yield: 24 cake pops 1x
- Category: Dessert
- Method: Baking
- Cuisine: American
- Diet: Vegetarian
Description
Delightful and customizable cake pops perfect for celebrating love on Valentine’s Day.
Ingredients
- 1 cake mix (your choice)
- 1 cup frosting (store-bought or homemade)
- 12 oz chocolate melting wafers or chocolate chips
- Lollipop sticks
- Sprinkles (optional)
Instructions
- Bake the cake according to package instructions and let it cool completely.
- Crumble the cooled cake into a large bowl.
- Mix in the frosting until well combined.
- Roll the mixture into small balls and place them on a baking sheet.
- Freeze for about 30 minutes until firm.
- Melt the chocolate according to package instructions.
- Dip the tip of each lollipop stick into the melted chocolate, then insert it into a cake ball.
- Dip each cake pop into the melted chocolate, coating it completely.
- Allow excess chocolate to drip off and then place the pops upright in a stand or a piece of styrofoam.
- Decorate with sprinkles if desired and let set.
Notes
Make sure to let the cake cool completely before crumbling it to avoid soggy cake pops. Use quality chocolate for dipping to achieve a smooth coating.
Nutrition
- Serving Size: 1 cake pop
- Calories: 150
- Sugar: 10g
- Sodium: 50mg
- Fat: 6g
- Saturated Fat: 3g
- Unsaturated Fat: 2g
- Trans Fat: 0g
- Carbohydrates: 21g
- Fiber: 1g
- Protein: 2g
- Cholesterol: 20mg